
Coconut chutney is a versatile and flavorful condiment that hails from South Indian cuisine, an area known for its rich and diverse culinary practices. It is a staple accompaniment for many South Indian dishes such as dosas (a type of fermented crepe), idlis (steamed rice cakes), vadas (savory fried snacks), and uttapams (a pancake-like dish), among others. The beauty of coconut chutney lies in its simplicity and the harmony of flavors that come together with minimal cooking.
The primary ingredient, as the name suggests, is fresh grated coconut, which provides a sweet and creamy base for the chutney. This is often balanced with the inclusion of green chilies, ginger, and sometimes garlic, bringing a fresh heat that cuts through the richness of the coconut. Additionally, roasted lentils, such as chana dal or urad dal, are included for their earthy taste and to add texture to the chutney.
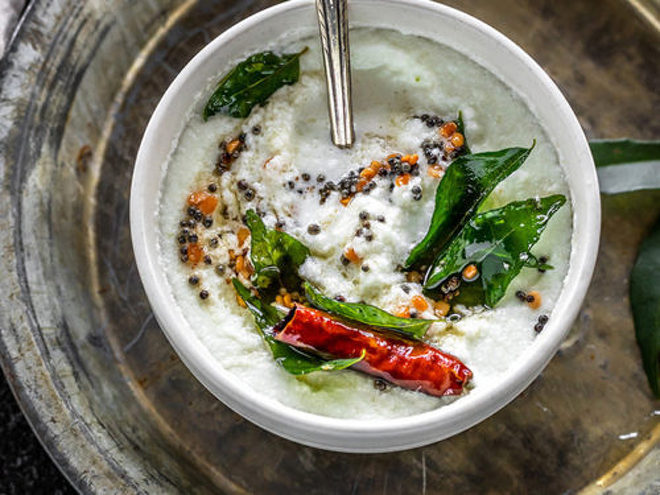
Coconut Chutney Recipe


Coconut Chutney
Equipment
- 1 blender
- 1 small skillet
Ingredients
- 1 cup shredded fresh coconut or frozen, thawed to room temperature
- 1/2 cup roasted split chickpeas
- 2 green chiles finely chopped
- 1 1/2-inch piece fresh ginger, peeled and finely chopped
- 1 teaspoon salt
- 1 cup water divided
- 2 teaspoons vegetable or corn oil
- 1 teaspoon mustard seeds
- 1/4 teaspoon asafoetida
- 1 curry leaf sprig
Instructions
- In a blender, combine the coconut, roasted split chickpeas, green chiles, ginger, and salt. Pulse until the chickpeas are coarsely ground and a coarse consistency forms.
- Add 1⁄2 cup of water and blend until a smooth paste forms. Transfer the chutney to a small bowl. Rinse the blender with the remaining 1⁄2 cup of water and add that to the chutney. Mix well.
- Heat a small skillet over medium heat, add the oil and heat for 30 seconds.
- Add the mustard seeds, asafoetida, and curry leaves. Cook until the mustard seeds begin to sputter, about 1 minute. Turn off the heat. Stir the spice mix into the chutney until well mixed.
Notes
Cooking Tips about Coconut Chutney
- Fresh is Best: Use fresh coconut if possible, as it imparts a richer taste and creamier texture. If you don’t have access to fresh coconut, unsweetened desiccated coconut is an acceptable substitute, but you may need to soak it in warm water before grinding.
- Roasting for Depth: Lightly roasting the chana dal or urad dal before grinding can enhance the nutty flavor of the chutney. Similarly, toasting the grated coconut can add a subtle smokiness.
- Balancing Flavors: Adjust the number of green chilies based on how spicy you want your chutney to be. Remember that the heat level can vary greatly among different types of chilies.
- Consistency Control: The amount of water added while grinding affects the consistency. Use less water for a thicker chutney that’s ideal for spreading on dosas, and a bit more for a looser consistency perfect for dipping idlis.
- Aromatic Tadka: For the tadka, use a small pan and be sure that the oil is hot before adding the mustard seeds. Once they start to pop, add the curry leaves and any other spices. Pour it over the chutney immediately to capture the most aroma.
- Acidity and Sweetness: Depending on your preference, a dash of tamarind can be included for tanginess; unripe mangoes also offer a similar tart profile. If you prefer a touch of sweetness, consider adding just a little bit of jaggery.
- Herb Variations: For a greener and refreshing variant, blend in some coriander or mint leaves as well.
- Proper Storage: Store coconut chutney in an airtight container in the refrigerator if not consumed immediately, as fresh coconut spoils quickly. Use it within 1-2 days for best quality.
- No Metal Containers: It’s advisable to store and serve coconut chutney in glass or ceramic containers since it is slightly acidic and can react with metal.
- Experimenting is Key: Don’t hesitate to alter the ingredients and their quantities to suit your palate. Coconut chutney is very forgiving and versatile, allowing for much experimentation.
Serving suggestions baout Coconut Chutney
- Traditional Pairings: Serve coconut chutney as a classic accompaniment to South Indian breakfast items such as dosas, idlis, vadas, and uttapams. It acts as a moistening agent and adds flavor to these relatively mild dishes.
- With Rice: A dollop of coconut chutney can also go well with plain steamed rice or mixed with rice for a quick flavored rice option.
- As a Spread: Use coconut chutney as a spread for sandwiches, wraps, or even on a slice of toast for a unique twist. It pairs especially well with vegetables and cured meats.
- With Snacks: Use it as a dip for various snacks. Think along the lines of potato chips, crackers, or even vegetable sticks like carrots and cucumbers.
- In Fusion Cooking: You can get creative with fusion cuisine by pairing coconut chutney with non-Indian dishes such as grilled chicken, fish, or as a unique sauce for tacos.
- As a Salad Dressing: Thin out the chutney with a bit more water or some citrus juice, and it can serve as a refreshing dressing for tropical salads.
- Stuffed in Parathas: Mix coconut chutney into the dough or use it as filling for parathas (Indian stuffed flatbreads) to infuse them with flavor.
- In Burgers or Kebabs: Elevate your burgers or kebabs by adding a touch of coconut chutney either within the mix or as a condiment on the side.
Top 5 FAQs about Coconut Chutney
- What are the key ingredients in coconut chutney? Fresh grated coconut is the primary ingredient, balanced with green chilies, ginger, and sometimes garlic for heat. Roasted lentils such as chana dal or urad dal add texture and earthiness to the chutney.
- How do I make coconut chutney? To make coconut chutney, grind together fresh grated coconut, roasted lentils, green chilies, ginger, and salt with a bit of water to your desired consistency. For added flavor, perform a tadka by frying mustard seeds, curry leaves, and asafoetida in oil and adding it to the chutney.
- Can I store coconut chutney, and if so, how long does it last?Yes, you can store coconut chutney in an airtight container in the refrigerator for 1-2 days due to the perishable nature of fresh coconut. Avoid storing it in metal containers as the chutney can react with metal.
- Is coconut chutney spicy? The spiciness of coconut chutney can be adjusted based on the amount and type of green chilies used. You can tailor the heat level to your personal preference.
- Are there any variations of coconut chutney that I can try?Absolutely! There are many variations including those with tamarind for tanginess, mint or coriander leaves for freshness, and jaggery for sweetness. You can also experiment with other ingredients to suit your taste.
Coconut chutney is a beloved and quintessential element of South Indian cuisine, treasured for its delightful blend of sweetness from fresh coconut and the heat from green chilies and ginger. Thanks to its creamy texture and zesty flavor, it pairs beautifully with a myriad of traditional dishes like dosas, idlis, and vadas, enhancing their taste without overwhelming. Its preparation, involving minimal cooking and simple grinding, speaks to the ease and versatility of this condiment.
Leave a Reply